Location Page
After creating a new project, users will be asked to define the location of the project using the interactive Google map. The interactive map allows the user to define one or more areas of interest (AOI). The area of interest should correlate with the fields within the project area. The map is ONLY used for mainland United States. If you would like to simulate using an area outside of mainland United States, follow the instructions for User Input.
When defining the AOI, the underlying weather, soils, and slope information is retrieved from the underlying spatial data.
Mapping System
There are two ways to define your areas of interest(AOI): you may upload your own shapefile or you may manually draw your areas of interest(AOI) using the zoom features and drawing tools on the interactive map.
Upload Shapefile
If you already have a shapefile that you would like to use as your project area, you may upload the shapefile. You will need to upload a file that consists of at least four files with the same name but different extensions (.shp, .shx, .dbf, and .prj). Ensure that the .shp file is the format of an ESRI Shapefile that uses the geographic coordinate system (latitude and longitude). The shapefiles need to be stored within a .zip folder, and you need to upload the .zip folder.
-
Choosing a Shapefile: Select the button Choose File located above the Upload button as shown in the figure:

-
Uploading a Shapefile: Once you have located the shapefile(.zip folder) you wish to use, upload the file by clicking the Upload button.
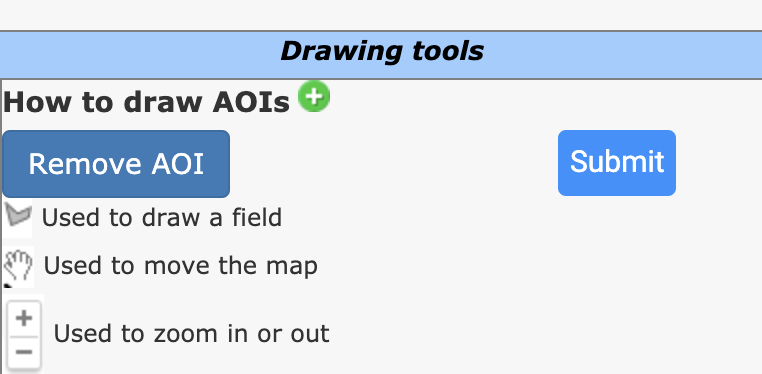
Submitting a Shapefile: You need to submit the changes to the map once you have uploaded the shapefile. Be sure to click the Submit button.
Zoom and draw the AOI
If you do not already have a shapefile, you may draw your areas of interest(AOI) using the zoom features and drawing tools on the interactive map. Users may draw multiple AOIs. AOIs should represent fields within the project area.
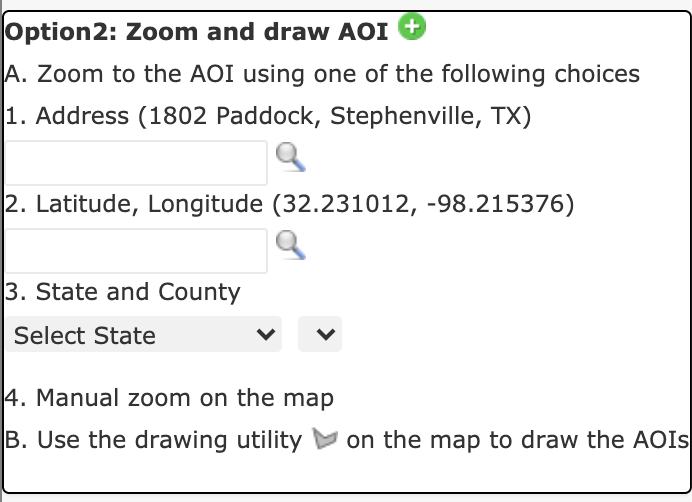
Zoom to your area of interest: A field is considered an area of interest(AOI). There are several ways to zoom in to your area of interest(AOI). You may enter an address, enter the lat/long (using the correct format where latitude comes before longitude, north latitude is positive, east longitude is positive) and select the state and county from the available dropdown lists, or manually zoom on the map using the zoom tool located near the bottom right corner of the map.
Draw your Area of Interest (AOI): Once you are zoomed in on your area of interest, click the polygon button
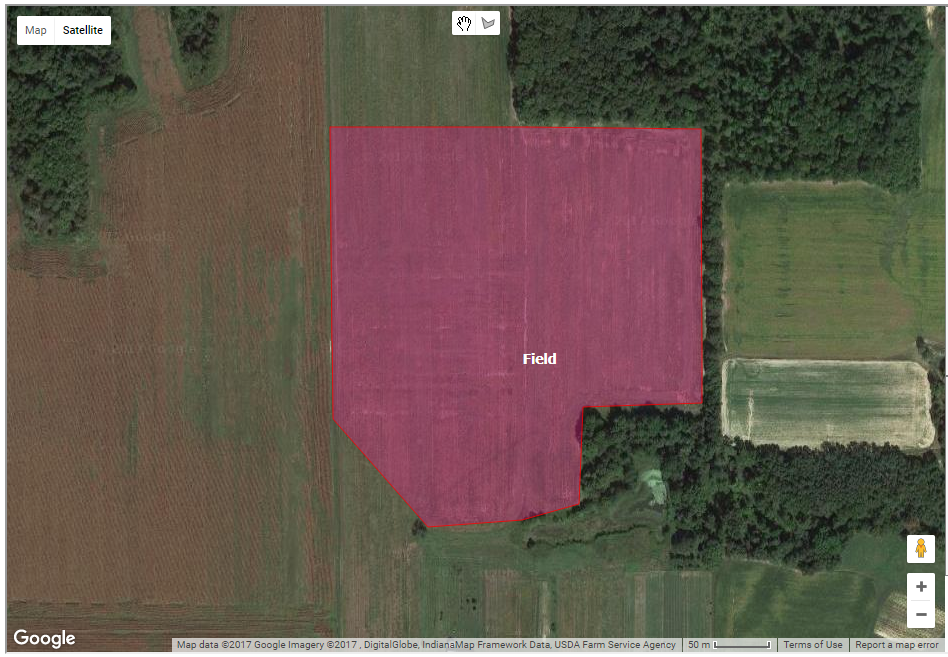
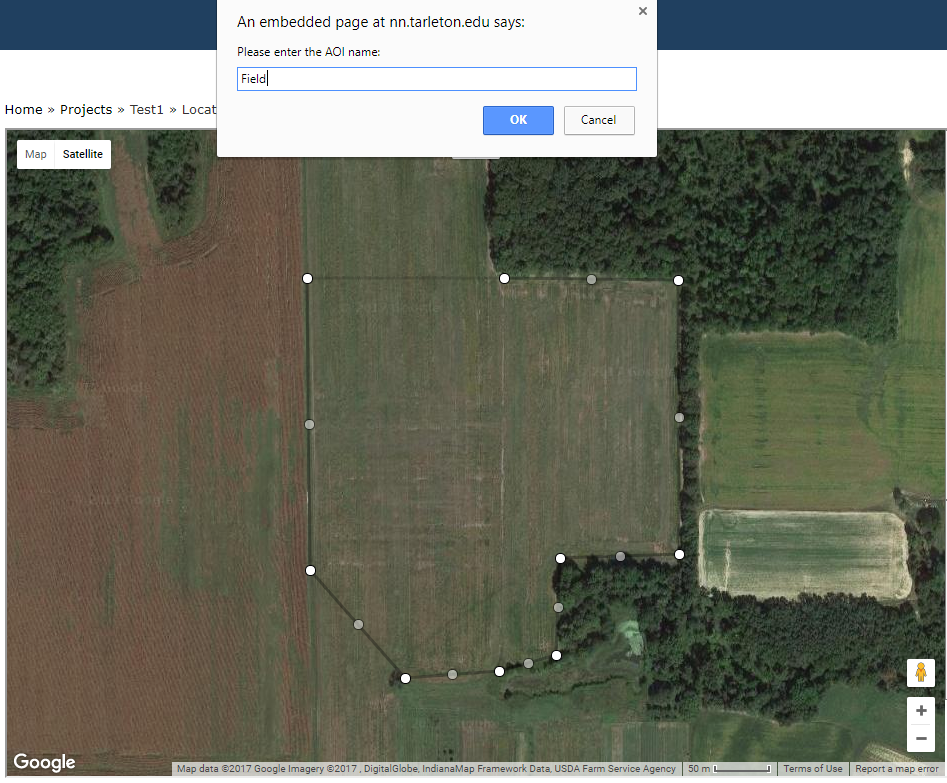
 at the top center of the map. Next, use your mouse and click to define the corners of your polygon as shown in the figure below. Keep in mind that a field is considered an area of interest(AOI). After drawing the field, a message will pop up telling the user to enter the name of the AOI as shown below. Enter the name of the field and click OK. As the user enters the name, it will replace the default name in the text box for the field as shown in the following figure. From this point on, the field name entered will refer to the selected location. You may create multiple AOIs/fields for your project. Simply click on the polygon button again to create additional AOIs.
Submitting AOIs: Once you have one or more AOIs, you MUST click the Submit button. The actual map is a different program that is being ran within NTT. By clicking Submit, the drawings are actually submitted to NTT.
Deleting AOIs: To remove an AOI, first select the field that you would like to delete, and then click the Remove AOI button.
Once the user clicks OK, the field location will be highlighted as shown below.