Operation Page
Once a scenario has been created on the Management page, the user is advanced to the Operations page to begin inputting the management characteristics such as the crop schedule, tillage, fertilizer, harvest, and grazing operations.
A cropping system is REQUIRED for the user to be able to advance and simulate the NTT. The user can add rotations that are one year in length or much longer. A field may have a single crop or multiple crops.
Listed below are different options available in the Operation Page for manipulating a cropping system.
Add Crop to Rotation
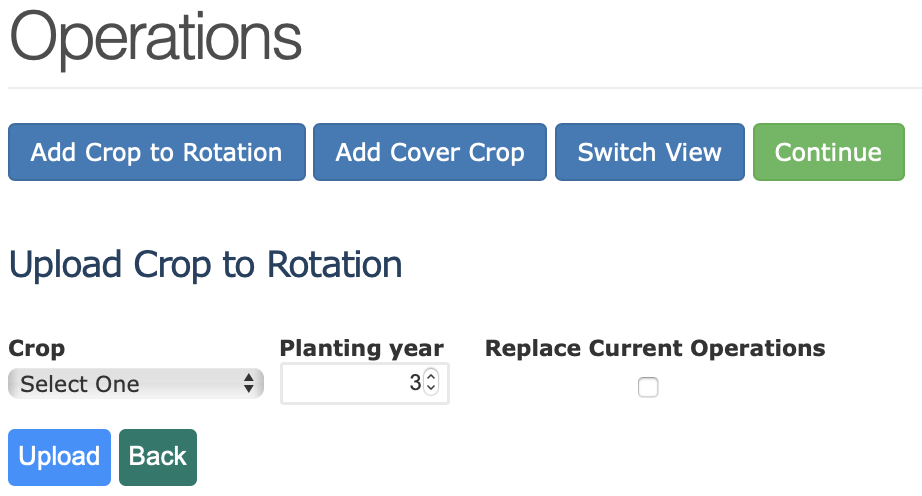
To add a crop to the rotation, click Add Crop to Rotation. The user is then asked to select a crop from the pick list, a tillage type (No-till, reduced till, or intensive till), and rotation year. The crop list is customized according to the region in which the project is located. The rotation year indicates the sequence of the crop within the crop schedule, it does not represent the calendar year. Once the user has selected a crop type, tillage type and rotation year, clicking Upload will add the crop to the crop schedule.
Note: If the checkbox for Replace Current Operations is checked, all current operations will be deleted when the user uploads.
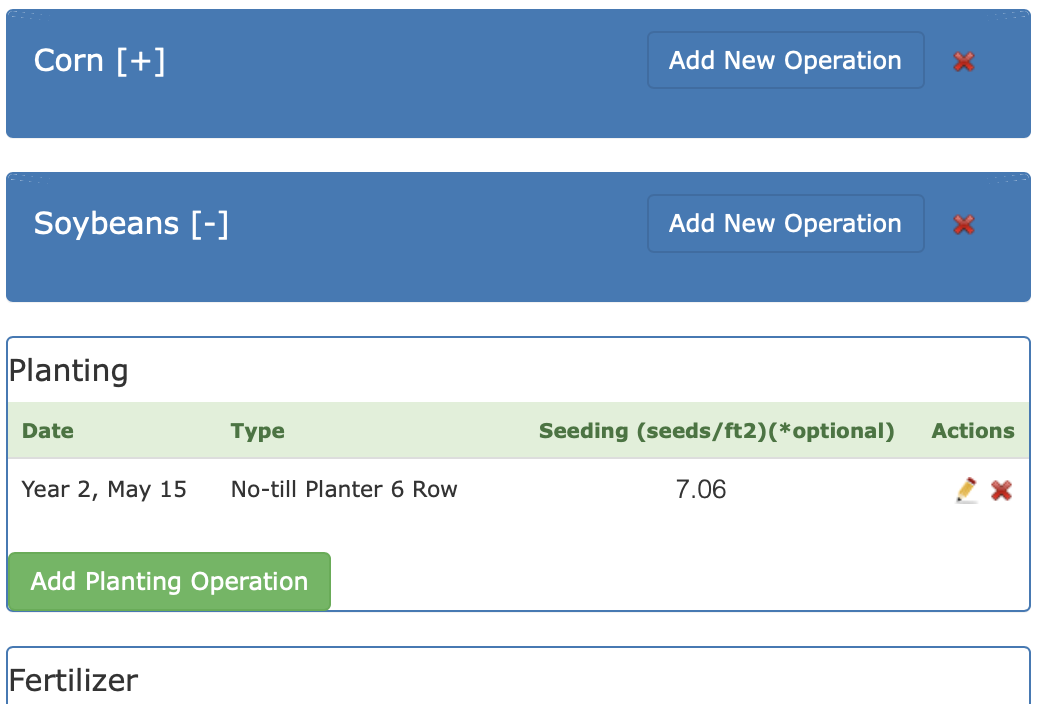
Once a crop is added to the crop schedule, the operations list for each crop can be rolled up or expanded by clicking the [-] or [+] buttons next to the crop name, respectively.
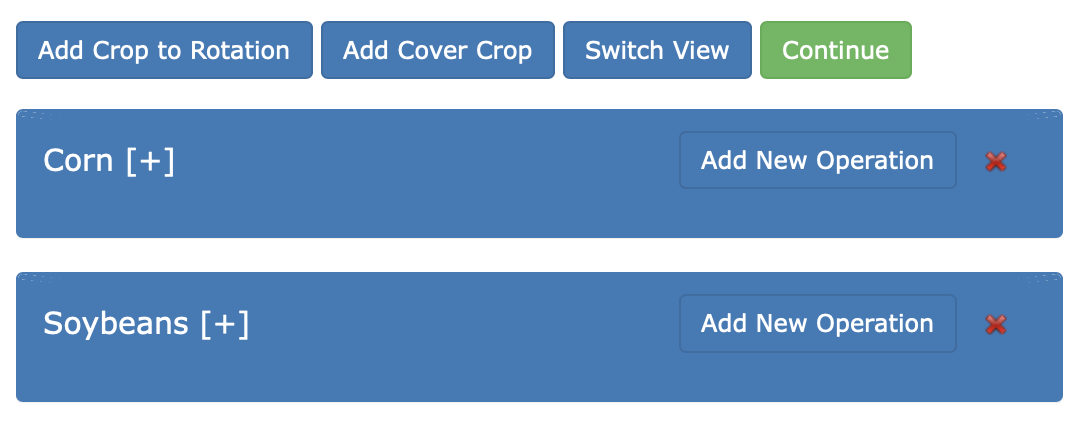
Clicking [+] to expand the operation list will display several default management characteristics including a planting date, fertilizer applications, tillage schedule, and harvest. These operations can be modified or deleted as needed and new operations can be added.
Add New Operation
Users can add operations to their rotations or build a cropping system from scratch using the Add New Operation button(located to the right of every crop in the operations list). You will be asked to select the crop, operation type, year, and date. The year indicates the position of the crop in the crop schedule, for example, CORN year 1 and SOYBEAN year 2.
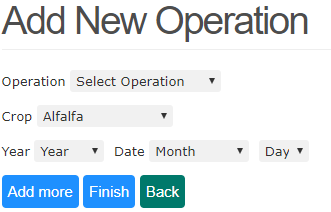
Depending on the operation type there will be additional fields to enter. Below are descriptions of the different operation types and the additional required fields for each.
PlantingPlant method: User must indicate the planting method using the pick-list of planting equipment provided.
Seeding Amount (seeds/ft2 or trees/ac): This field is pre-filled with standard seeding rates for each crop type. If the user has more specific information on seeding rate they may enter it here.
Fertilizer category: User must indicate the fertilizer category (commercial, liquid manure, or solid manure).
Fertilizer Type: The fertilizer type pick list will vary depending on the fertilizer category selected. For manure fertilizer, pick list will contain types of animal manure.
Amount: User needs to indicate the amount of fertilizer applied. Units will vary depending on the type of fertilizer selected (lbs/ac, tons/ac, 1000 gals/ac).
Depth: If the fertilizer is incorporated, user should indicate the depth of incorporation here. If fertilizer is not incorporated, this field can be left blank.
Fertilizer Composition (commercial fertilizer only): For commercial fertilizer, these fields indicate the N and P composition. These fields are pre-filled based on the fertilizer type selected, but can be modified if needed.
Total N concentration (solid/liquid manure only): For manure fertilizer, the user should indicate the total N content per ton of solid manure or per 1000 gallons of liquid manure. Typical values are pre-filled for the user, but can be modified.
Total P concentration (solid/liquid manure only): For manure fertilizer, the user should indicate the total P content per ton of solid manure or per 1000 gallons of liquid manure. Typical values are pre-filled for the user, but can be modified.
Moisture content (solid/liquid manure only): For manure fertilizer, this is the percentage, by weight, of moisture content in the manure. Typical values for each manure type are provided, but can be modified by the user.
Tillage Method: User must indicate the tillage method using the drop down selection.
No additional data needed beyond the crop, year and date.
End of Season requires only the crop, year and date information from the user.
Note: End of season indicates to the model that the crop is removed from the field. If an End of Season operation is not present, then the model assumes that the crop is left growing. End of season should be used for all annual crops. For certain perennial crops like hay and pasture, End of Season operations may be absent from the crop schedule.
Manual IrrigationIrrigation method: The user indicates the type of sprinkler system that is being used.
Amount: User indicates the volume of water applied in this irrigation event in inches.
Irrigation efficiency: This field defaults to a typical irrigation efficiency value (as a fraction) based on the irrigation method that is selected. This value can be modified.
Note: On the Conservation Practices page there is an option for autoirrigation and autofertigation which automates irrigation on your field based on user parameters. Please see autoirrigation/autofertigation for more information.
Continuous GrazingStart/End Grazing dates: User indicates the start and end dates of grazing on the field.
Animal Type: User indicates the type of animals being grazed on the field.
Animal Units: User indicates the total animal units being grazed on the field. Animal units represent 1,000 lbs of live animal weight.
Hours in Field: User indicates the total hours per day that animals are grazed in the field.
The rotational grazing operation, unlike continuous grazing, assumes that the pasture is divided into paddocks and that livestock are moved through the paddocks as needed. Thus, each paddock is given a recovery period between grazing events, improving vegetative cover.
Start/End Grazing dates: User indicates the start and end dates of grazing on the field.
Animal Type: User indicates the type of animals being grazed on the field
Animal Units: User indicates the total animal units being grazed on the field. Animal units represent 1,000 lbs of live weight.
Hours in Field: User indicates the total hours per day that animals are grazed in the field.
Number of consecutive days grazed at a time (in each paddock): User indicates the number of days livestock will spend in each paddock before being rotated to a new paddock.
Pasture rest time (days) between grazing: User indicates the number of days that the pasture is rested between rotational grazing cycles.
No additional data required by users beyond crop, year and date
Amount: User must indicate amount of lime applied (lbs/ac).
Add a Cover Crop
To add a cover crop, click Add Cover Crop button at the top of the Operations page. Users will indicate the type of cover crop, cover crop year, planting date, and planting method. The cover crop year should indicate the year within the rotation that the cover crop is planted. NTT will automatically add the harvest date for the cover crop based on the next crop in the rotation. Cover crops are not fertilized and are not harvested, rather they are chopped prior to planting of the next crop in the rotation.
Note: If you wish to add a commercial cover crop, please do so as you would add another crop to your crop schedule. For example, add “Winter Wheat” to your crop schedule by clicking Add Crop to Rotation and selecting from the crop pick-list (NOT using the Add Cover Crop button).
Adding a crop this way will allow users to apply fertilizer, tillage, harvest operations, etc.
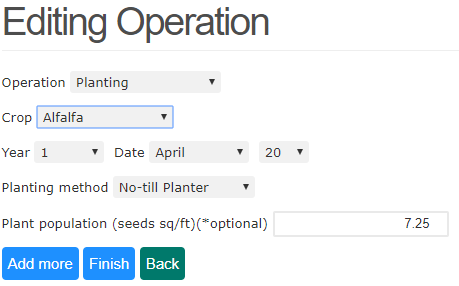
Edit Operation
Users may change the values or any other information in an operation by clicking on the Edit  icon in the Actions column next to the operation. Once the operation has been edited, click Finish to save and return to the Operations page. Clicking Back will return the user to the Operations page without saving changes to the operation. Clicking Add More will save change to the current operation and allow the user to continue adding additional operations without returning to the Operations page.
Delete an Operation
To delete an operation, click the Delete  icon in the Actions column of the operation you wish to delete.
Switch View
By clicking Switch View at the top of the page, you can switch your view from one that is organized by crop and operation type to one that is organized by date.
Once you are satisfied with your crop schedule, click Continue at the top of the page. You will be advanced to the Conservation Practices page where you can indicate any conservation practices that are present on the field.