Management Scenarios
Overview
After clicking Save and Continue on the Soils page, users will be advanced to the Management Scenarios page. The Management Scenarios page is a field-level page where the user creates, manages and simulates management scenarios for each field. Users may create multiple scenarios for each field in order to compare how different crop management and conservation practices will impact nutrient losses and yields.
It is recommended to choose a baseline scenario with the status quo management on the operation page, copy the baseline scenario and edit the scenario name in the management page, and change one management scenario at a time in the operation page.
Creating a Field Scenario
The user can create a scenario by clicking on the Add New Scenario button. Users will be asked to name the scenario, for example “Baseline” or “Alternative” or “Auto-Irrigation”. After adding a name to the scenario, click the Save button which will create the scenario and advance the user to the Operations page, where the user will begin to define the crop schedule and conservation practices. (see Operations Page)
Copy Scenario from other Field
The user can copy scenarios from other fields and use it in the existing field. To copy scenarios, click Copy Scenario from other project/field at the top of the page, then select the project, field and scenario that you wish to copy. Click the Copy button when done. The scenario will be copied and will appear in the list of management scenarios for that field. In Addition, a scenario could be duplicated, renamed and modified for different management scenario within a field by using the copy  icon under the Actions column.
Upload your own scenarios
The user can upload their own scenario(s) from their local computer. To upload scenario(s), click Upload your own scenarios and select the type of file you would like to upload and select Choose File.
Manage Field Scenarios
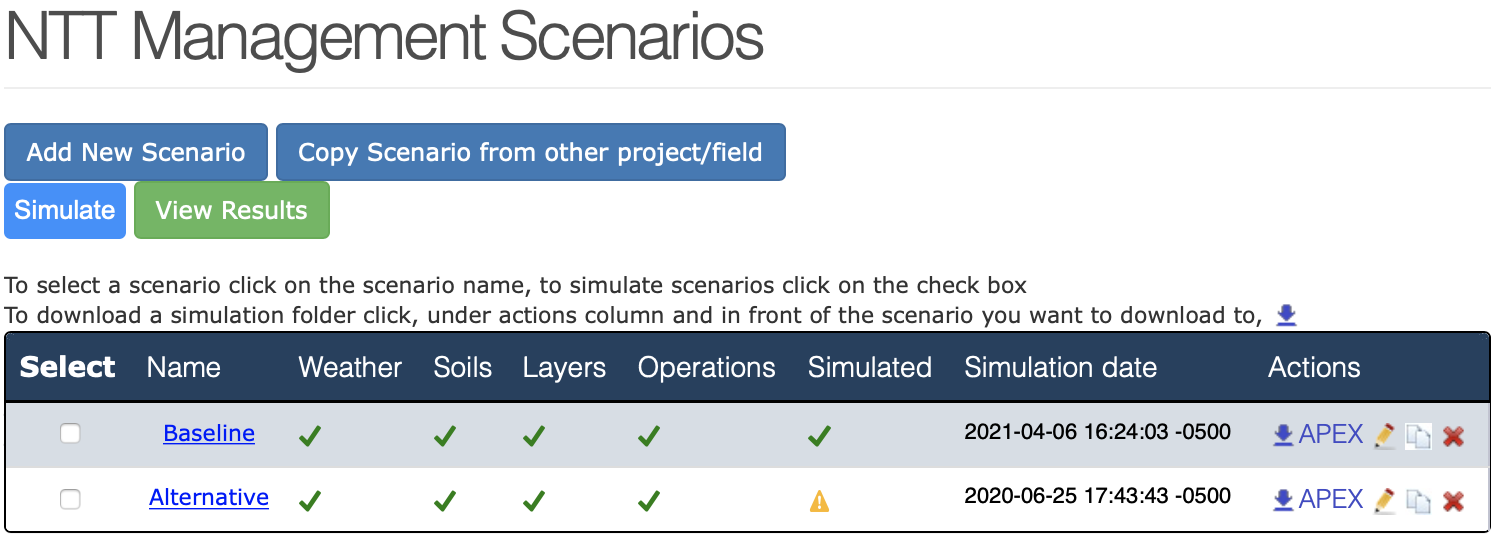
The Management Scenarios page includes a list of the scenarios created for the field. Each scenario has a scenario Name as well as fields for Weather, Soils, Operations and Simulation date in addition to the options(Download APEX, Edit, Copy, Remove) under the Actions column.
A ![]() icon will appear in the Weather, Soils, Layers and Operations columns when these are present for the scenario. In order to successfully simulate a scenario, all four of these elements must display the
icon will appear in the Weather, Soils, Layers and Operations columns when these are present for the scenario. In order to successfully simulate a scenario, all four of these elements must display the ![]() icon. The Weather, Soils and Layers should be checked when a management scenario is first created, as these elements are derived from the map and are automatically associated with each field. However, the Operations column will be blank until the user enters management information for the scenario. A
icon. The Weather, Soils and Layers should be checked when a management scenario is first created, as these elements are derived from the map and are automatically associated with each field. However, the Operations column will be blank until the user enters management information for the scenario. A ![]() icon will appear in the Operations column once management information is present for the field.
icon will appear in the Operations column once management information is present for the field.
The Simulated field indicates whether or not the scenario has been simulated. The Simulated field will have a ![]() icon if the scenario has never been simulated. Once the scenario has been simulated, the
icon if the scenario has never been simulated. Once the scenario has been simulated, the ![]() icon will appear.
icon will appear.
The Simulation date field indicates the date in which the scenario was last simulated by the model. If the Simulation date field is blank it means that the scenario has not been simulated. Otherwise, the most recent simulation date will be present. (See Simulating Field Scenarios to learn more about how to simulate a scenario or multiple scenarios.)
The Actions column contains four different icons, representing different actions.
After simulating a scenario, the  APEX icon allows you to download APEX files (This feature is generally for advanced users who may wish to save these files to run in another version of APEX. Alternately, this feature can be used for those who wish to store project files locally rather than on the server. APEX files can be uploaded and viewed on the Project Management page).
The edit ![]() icon allows you to modify the name of the scenario.
icon allows you to modify the name of the scenario.
The copy icon creates a copy of your management scenario.
The delete  icon will delete the management scenario.
Simulating Field Scenarios
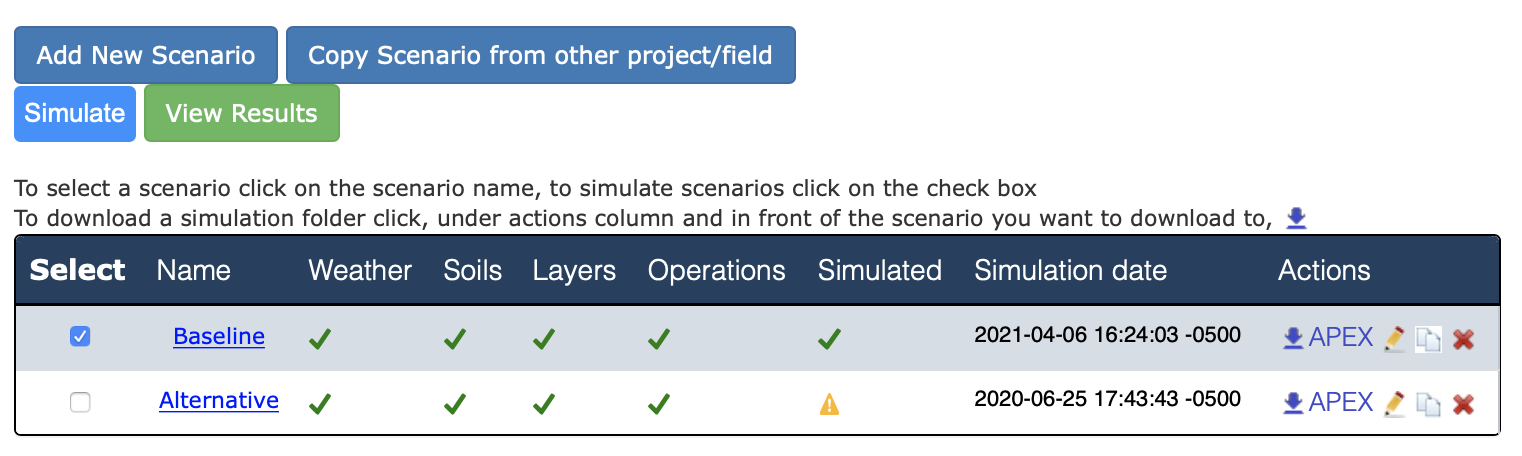
Once you have created one or more scenarios for your field you must simulate the scenarios to obtain results. By simulating the scenarios you are running the project through the APEX model which will return results for estimated nutrient and sediment losses as well as crop yields. To simulate a scenario, check the box next to the scenario(s) you wish to run and then click the Simulate button.
Before attempting to simulate a scenario, please make sure that the ![]() icon is displayed in Weather, Soils, Layers and Operations columns. Each of these elements must be present in the scenario before the scenario can be successfully simulated by the APEX model. Simulation of the scenarios may up to several minutes.
icon is displayed in Weather, Soils, Layers and Operations columns. Each of these elements must be present in the scenario before the scenario can be successfully simulated by the APEX model. Simulation of the scenarios may up to several minutes.
Once a scenario has been successfully simulated, the Simulated field will have a ![]() icon and the Simulation date field will show the date and time of the most recent simulation.
icon and the Simulation date field will show the date and time of the most recent simulation.
Note: If you modify a management scenario, you will need to re-simulate the scenario in order to view results of the updated scenario. If the scenario was copied into other fields before modifications, the simplest solution is to re-copy and re-simulate.
Viewing Results
Click the View Results button to view results of the simulated scenarios. You will be advanced to the Results page where you may select up to three scenarios to compare at a time. (See Viewing Results for more details.)